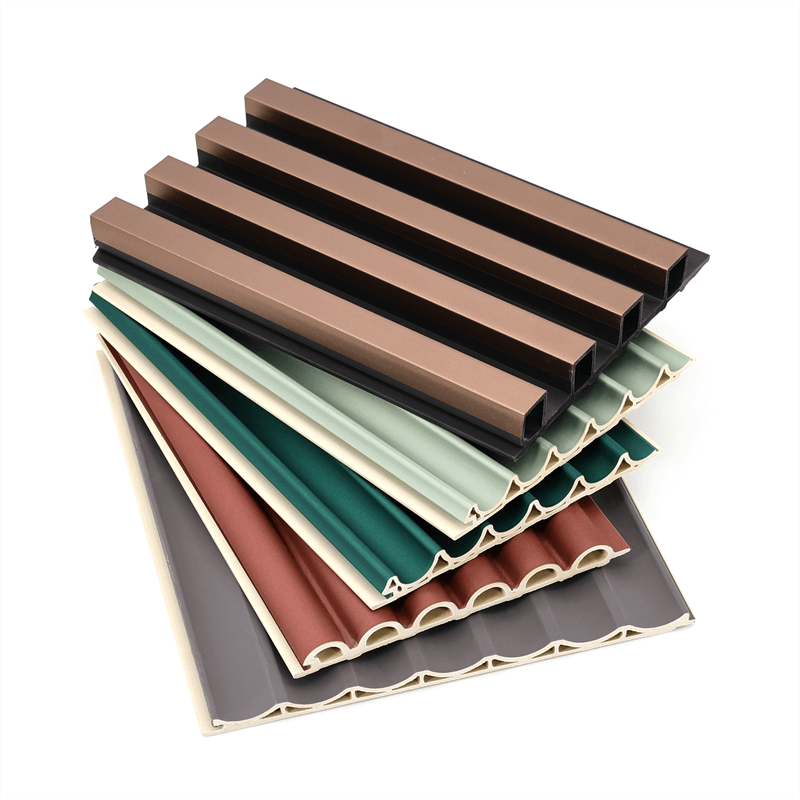
WPC (Wood Plastic Composite) wall panels have gained popularity as a versatile and durable option for interior and exterior wall cladding.
Their ease of installation and low maintenance requirements make them an attractive choice for homeowners and contractors alike.
In this essay, we will provide a comprehensive step-by-step guide on how to install WPC wall panels.
By following these instructions, you can achieve a professional and seamless installation that enhances the aesthetics and functionality of your space.
I. Pre-Installation Preparation
Before installing WPC wall panels, it is essential to prepare the area and gather the necessary tools and materials. This stage sets the foundation for a successful installation.
A. Evaluate the Wall Surface Start by assessing the condition and suitability of the wall surface.
Ensure that the wall is structurally sound, clean, and free from any debris or loose materials.
If there are any existing finishes or coatings, such as paint or wallpaper, consider removing them to create a smooth and even surface for the WPC panels.
B. Measure and Plan Accurate measurements are crucial for determining the quantity of WPC panels required and planning the layout.
Measure the height and width of the wall, accounting for any openings or obstacles.
This information will help you calculate the number of panels needed and determine their positioning on the wall.
C. Gather Tools and Materials To install WPC wall panels, you will need the following tools and materials:
- WPC wall panels
- Measuring tape
- Level
- Chalk line
- Panel adhesive or mounting clips
- Adhesive applicator or notched trowel
- Utility knife
- Screwdriver or drill (if using mounting clips)
- Screws or nails (if necessary)
- Sandpaper (if needed for surface preparation)
- Safety goggles and gloves
Ensure that you have all the necessary tools and materials readily available before starting the installation process.
II. Wall Panel Installation
Once you have completed the pre-installation preparation, you can proceed with installing the WPC wall panels. Follow these steps for a successful installation:
A. Start with a Baseboard or Starter Strip To create a clean and finished look, begin by installing a baseboard or starter strip along the bottom of the wall.
This strip will serve as a starting point for attaching the WPC panels.
B. Apply Adhesive or Mounting Clips Depending on the specific installation method recommended by the manufacturer, apply panel adhesive or mounting clips to the back of the WPC panels.
Panel adhesive provides a strong and permanent bond, while mounting clips offer a removable and adjustable option.
Follow the manufacturer’s instructions for the proper application of adhesive or mounting clips.
C. Position and Secure the Panels Carefully position the first WPC panel onto the wall, aligning it with the baseboard or starter strip.
Use a level to ensure that the panel is straight and plumb. Press the panel firmly against the wall to secure it in place.
If using mounting clips, attach them to the panel and then secure the panel to the wall using screws or nails.
D. Continue Installing Panels Continue installing the remaining WPC panels, following the same process of applying adhesive or mounting clips, positioning the panels, and securing them to the wall.
Use a level and a chalk line to ensure that the panels are installed in a straight and level manner.
III. Finishing Touches
After installing all the WPC wall panels, it’s time to complete the finishing touches to achieve a polished and professional appearance.
A. Trim and Cut Panels Trim any excess or overlapping portions of the WPC panels using a utility knife.
Make precise cuts to ensure that the panels fit seamlessly and align with any openings or edges.
B. Seal the Joints To create a watertight seal and enhance the overall durability of the installation, consider applying a silicone-based sealant to the joints between the WPC panels.
This step helps prevent moisture penetration and adds an extra layer of protection.
C. Clean and Inspect Thoroughly clean the installed WPC panels to remove any adhesive residue, dust, or debris.
Inspect the entire installation to ensure that all panels are securely attached and properly aligned. Make any necessary adjustments or repairs as needed.
IV. Maintenance and Care
To prolong the lifespan and maintain the aesthetic appeal of your WPC wall panels, it is important to follow proper maintenance practices.
A. Regular Cleaning Regularly clean the panels using a mild soap solution and a soft cloth or sponge.
Avoid abrasive cleaners or materials that may scratch or damage the surface of the panels. Rinse with clean water and wipe dry to prevent water spots or streaks.
B. Avoid Harsh Chemicals Avoid using harsh chemicals or solvents on the WPC panels, as they can cause discoloration or damage to the surface.
Instead, use gentle cleaning agents that are specifically designed for use on WPC materials.
C. Preventive Measures Take preventive measures to protect the panels from scratches, impacts, and excessive moisture.
Avoid dragging or moving heavy objects against the panels, and use coasters or protective mats on surfaces where items may be placed.
Installing WPC wall panels can transform the aesthetics and functionality of any space.
By following this step-by-step guide, you can achieve a successful and professional installation.
Remember to carefully prepare the wall surface, gather the necessary tools and materials, and follow the manufacturer’s instructions for adhesive or mounting clip application.
With proper installation and regular maintenance, WPC wall panels will enhance the visual appeal, durability, and longevity of your walls.
Enjoy the benefits of this versatile and eco-friendly wall cladding solution in your home or commercial space.
In conclusion, installing WPC wall panels offers numerous benefits, including versatility, durability, and ease of installation.
By following the step-by-step guide outlined in this essay, you can transform your space and achieve a seamless and professional installation.
WPC panels provide an attractive and modern aesthetic, making them suitable for a wide range of applications in both residential and commercial settings.
The pre-installation preparation, including evaluating the wall surface, measuring and planning, and gathering the necessary tools and materials, sets the foundation for a successful installation.
By ensuring the wall is clean and structurally sound, taking accurate measurements, and having all the tools and materials ready, you can streamline the installation process.
During the installation, it is important to carefully position the panels, use a level for proper alignment, and secure them firmly to the wall.
Whether using adhesive or mounting clips, following the manufacturer’s instructions is crucial to ensure a strong and secure installation.
After the panels are installed, paying attention to the finishing touches, such as trimming and sealing the joints, will enhance the overall appearance and longevity of the installation.
Regular maintenance and care, including proper cleaning and preventive measures, will help preserve the beauty and functionality of the WPC wall panels.
In conclusion, WPC wall panels provide a practical and aesthetically pleasing solution for transforming your space.
With their versatility, durability, and easy installation, they offer an attractive alternative to traditional wall materials.
Whether you’re renovating your home, designing a commercial space, or undertaking a new construction project, WPC wall panels are a worthy investment that will enhance the look and value of your property.
Embrace the possibilities that WPC wall panels offer and create a modern and stylish environment that will impress for years to come.